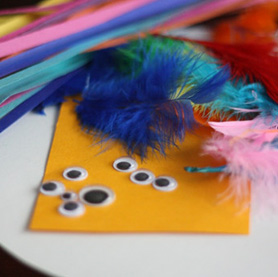
Tweet tweet! Springtime’s all about blooming flowers and chirping birds. This super easy and fun paper plate bird craft gets kids excited for spring and inspires creativity. And once crafting is done, kids can play with these little fluttery friends like toys. They’ll really love gently rocking their beautiful birdies.
Here’s what you’ll need:
- 9-inch paper plate, cardboard circle or circle cereal box cutout
- Googly eyes
- Craft feathers (optional)
- Colored construction paper
- Paint
- Glue
- Hairdryer (optional)
- Tape (optional)
- String (optional)
Here’s what to do:
- Fold your paper plate, cardboard circle or circle cereal box cutout in half so you know where the bird’s two sides meet. After you’ve done that, lay your plate back out flat so you can decorate both sides more easily without smearing paint
- Color your paper birdie with the paint. Will you make a bluebird? A robin? Or, a totally new kind of bird!?
- If you’ve got a hairdryer, use it to speed up the paint drying process.
- Now grab the glue and add some feathers for flair!
- Once your bird’s all nice and dry, fold it back in half.
- Cut out a small diamond of yellow or orange (or whatever color you’d like!) construction paper to make its beak.
- Simply fold the diamond in half to create a triangle beak, and glue one side of the triangle to an upper outer corner of the plate or cardboard circle.
- The eyes come next. Glue them onto the plate above or near the bird’s beak.
- Grab different colors of construction paper and cut out a few rectangular-shaped strips to create the tail. Will your bird have a long or short tail?
- Glue those colorful rectangular strips to the opposite upper outer corner (across from your bird’s eyes). Your bird loves its tail. And it can’t wait to get rocking!
If your bird’s having trouble staying folded, tape a small piece of string to the inside of the paper plate halves to hold them together. Try to leave about an inch and a half gap between the two plates.
Thank you for the awesome idea, happy hooligans! For more information and pictures, please click here.


